
Do you love a pretty inside garment? Putting your attention to the little details? Then you might enjoy sewing this type of neckband with a covered back seam allowance.

I have here sewn a sweatshirt with my new pattern the Frankie sweatshirt. This tutorial is also featured in Frankie's sewing instructions.
It's really helpful to have Aqua glue marker when doing this. I'm using the one from Prym, but there are other brands as well. If you don't have glue marker, use pins or clips.
Let me show you how I do it!
Attach the neckband
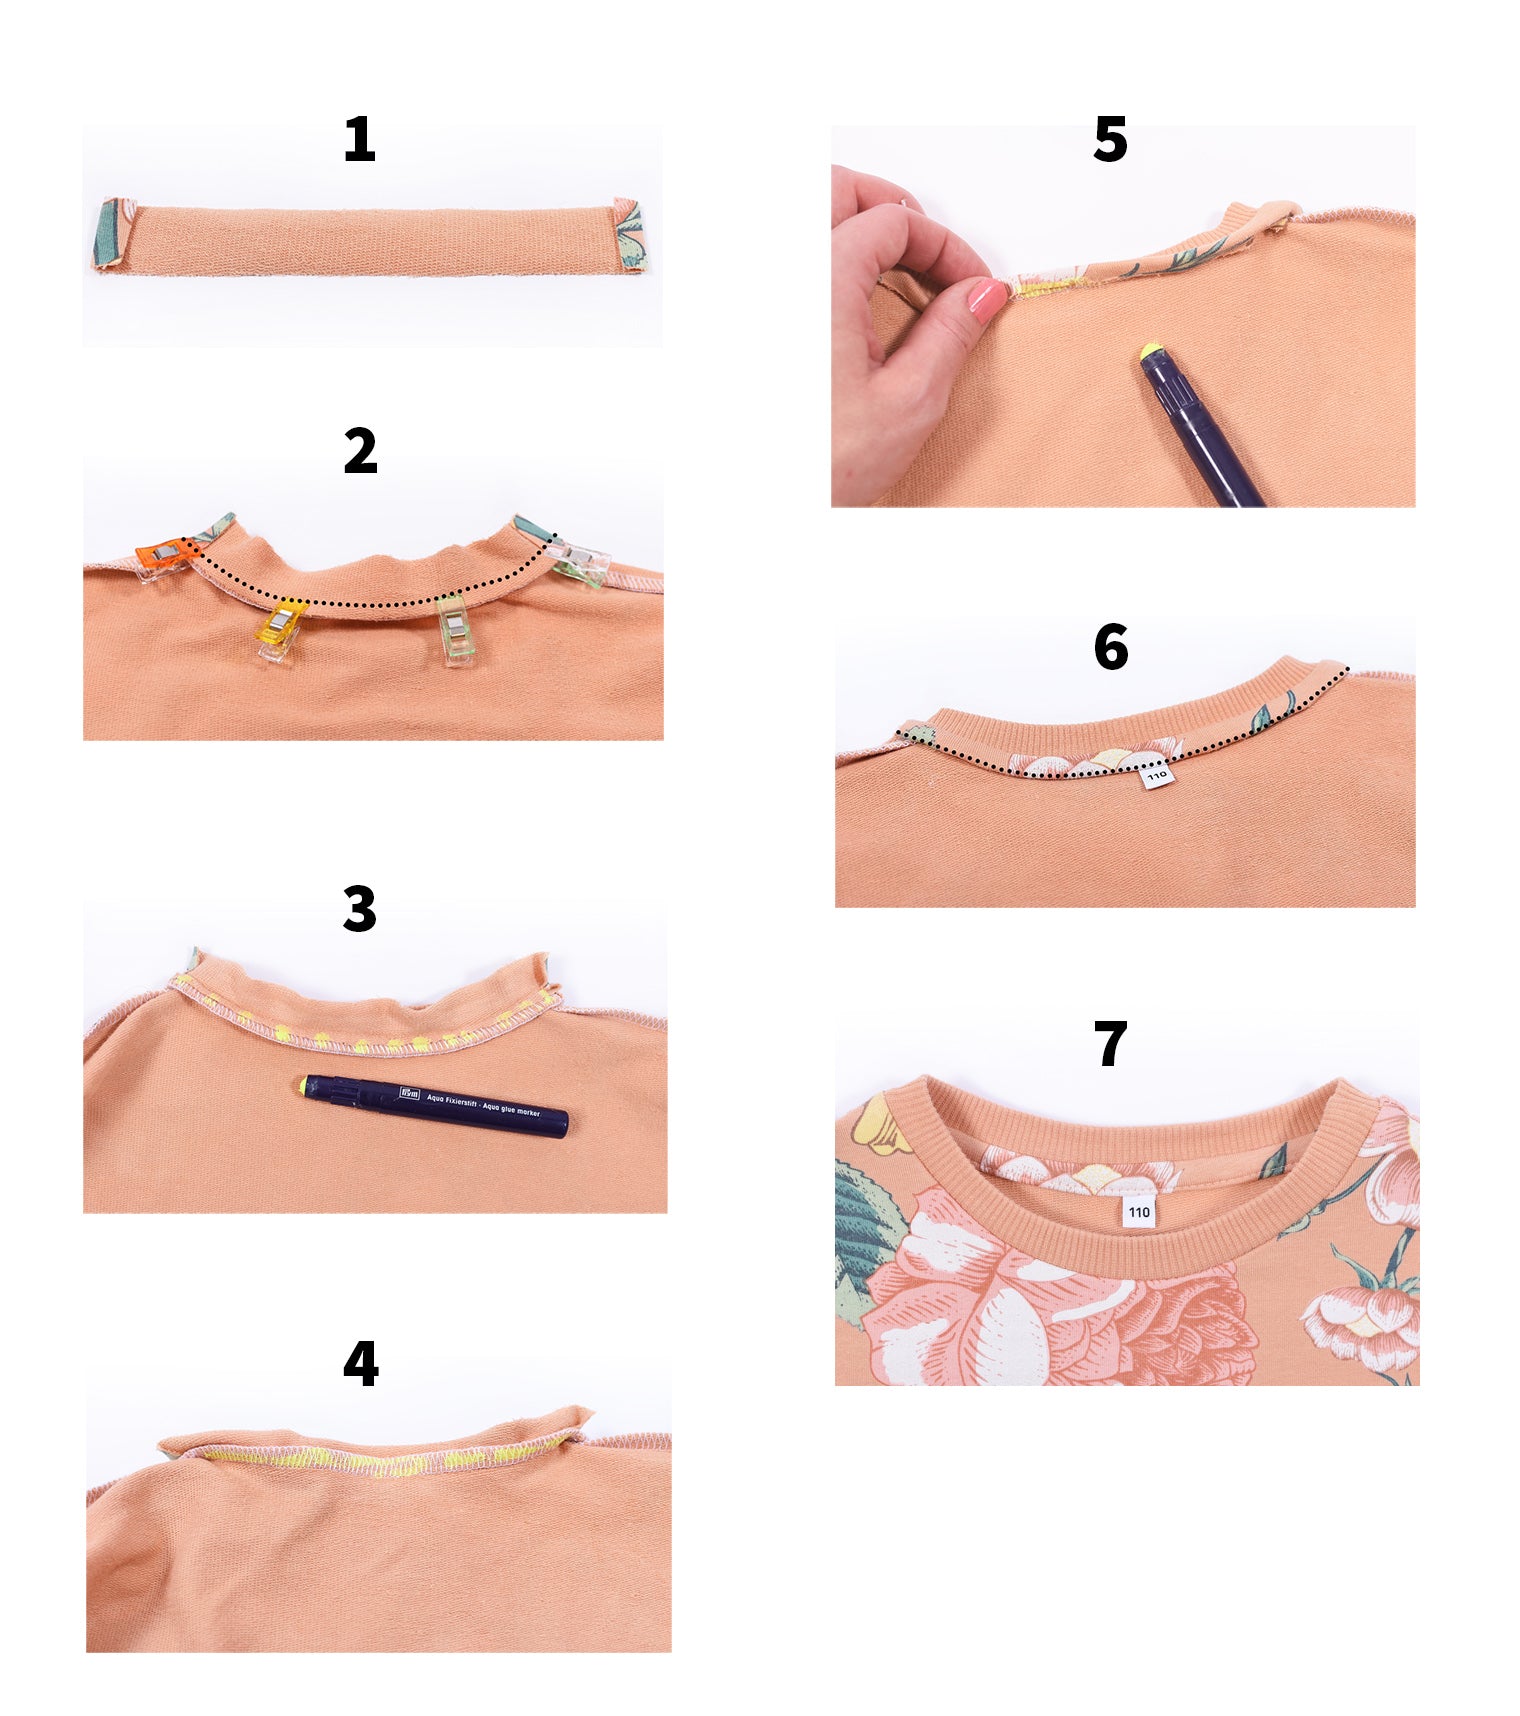
So before you start you need to attach the neckband. I've got a separate tutorial for that here. After the neckband is sewn to the neckline it will look like this:

1. Prepare the neckline strip
Cut a strip of fabric, this is the fabric that will cover the seam allowance. I recommend using a light weight fabric for less bulk, but you can use medium weight fabrics too (I'm using a medium weight french terry fabric here). (Go to my fabric weight guide).
If you've got my Frankie pattern you've already got a pattern piece for the neckline strip, and you can cut your fabric with that. If not, use these measurements:
LENGTH: The neckline strip should have the same length as the back neckline plus 2 cm - unless it is very stretchy with ≈80% stretch or more, then your neckline strip could be slightly shorter, say 80-90% or the back neckline, plus 2 cm.
WIDTH: Make the neckline strip 2,5 cm (1") wide if your neckband's seam allowance is 6-7 mm (1/4") wide. Or 3,3 cm (1 1/4") wide if your neckband's seam allowance is 1 cm (3/8") wide.
Fold the short sides of the neckline strip 1 cm (3/8") to the wrong side and press with an iron.

2. Attach and sew
Place the neckline strip's right side toward the seam allowance along the back piece. Match one of the neckline strip's long edges with the edge of the seam allowance.
Sew from one shoulder seam to the other (according to the markings in the picture), exactly on top of the seam that you sewed when attaching the neckband. It helps to keep the back piece on top when sewing so that you can actually see the neckband seam.


3. Optional: trim
Trim down the seam allowance of the neckline strip, for less bulk. I only do this if my neckline strip fabric isn't light weight.

4. Glue and fold
Put some aqua glue marker on the seam allowance. Then fold down the neckband over the glue and press with your fingers to attach it to the seam allowance (use pins if you don’t have glue marker).

5. Glue again, wrap around
Put glue again on the other side of the seam allowance and fold the neckline strip down over it. Now the neckline strip is wrapped around the seam allowance.

6. Glue again
Use glue marker one last time on the underside of the neckline strip, then press with fingers to attach it to the back piece.

7. Sew
Sew the neckline strip (and seam allowance) to the back piece, from one shoulder seam to the other. Use triple stretch stitch or straight stitch with long stitches, approx. 2 mm from the edge (according to the markings in the picture).
I sew with the sweatshirt’s wrong side up so I can easily see the edge of the neckline strip. If you want a size tag or similar place it underneath the neckline strip before sewing.

8. Press, then done!
One last press with your iron then it’s done! Gorgeous both from right and wrong side.


Wanna try this out yourself?
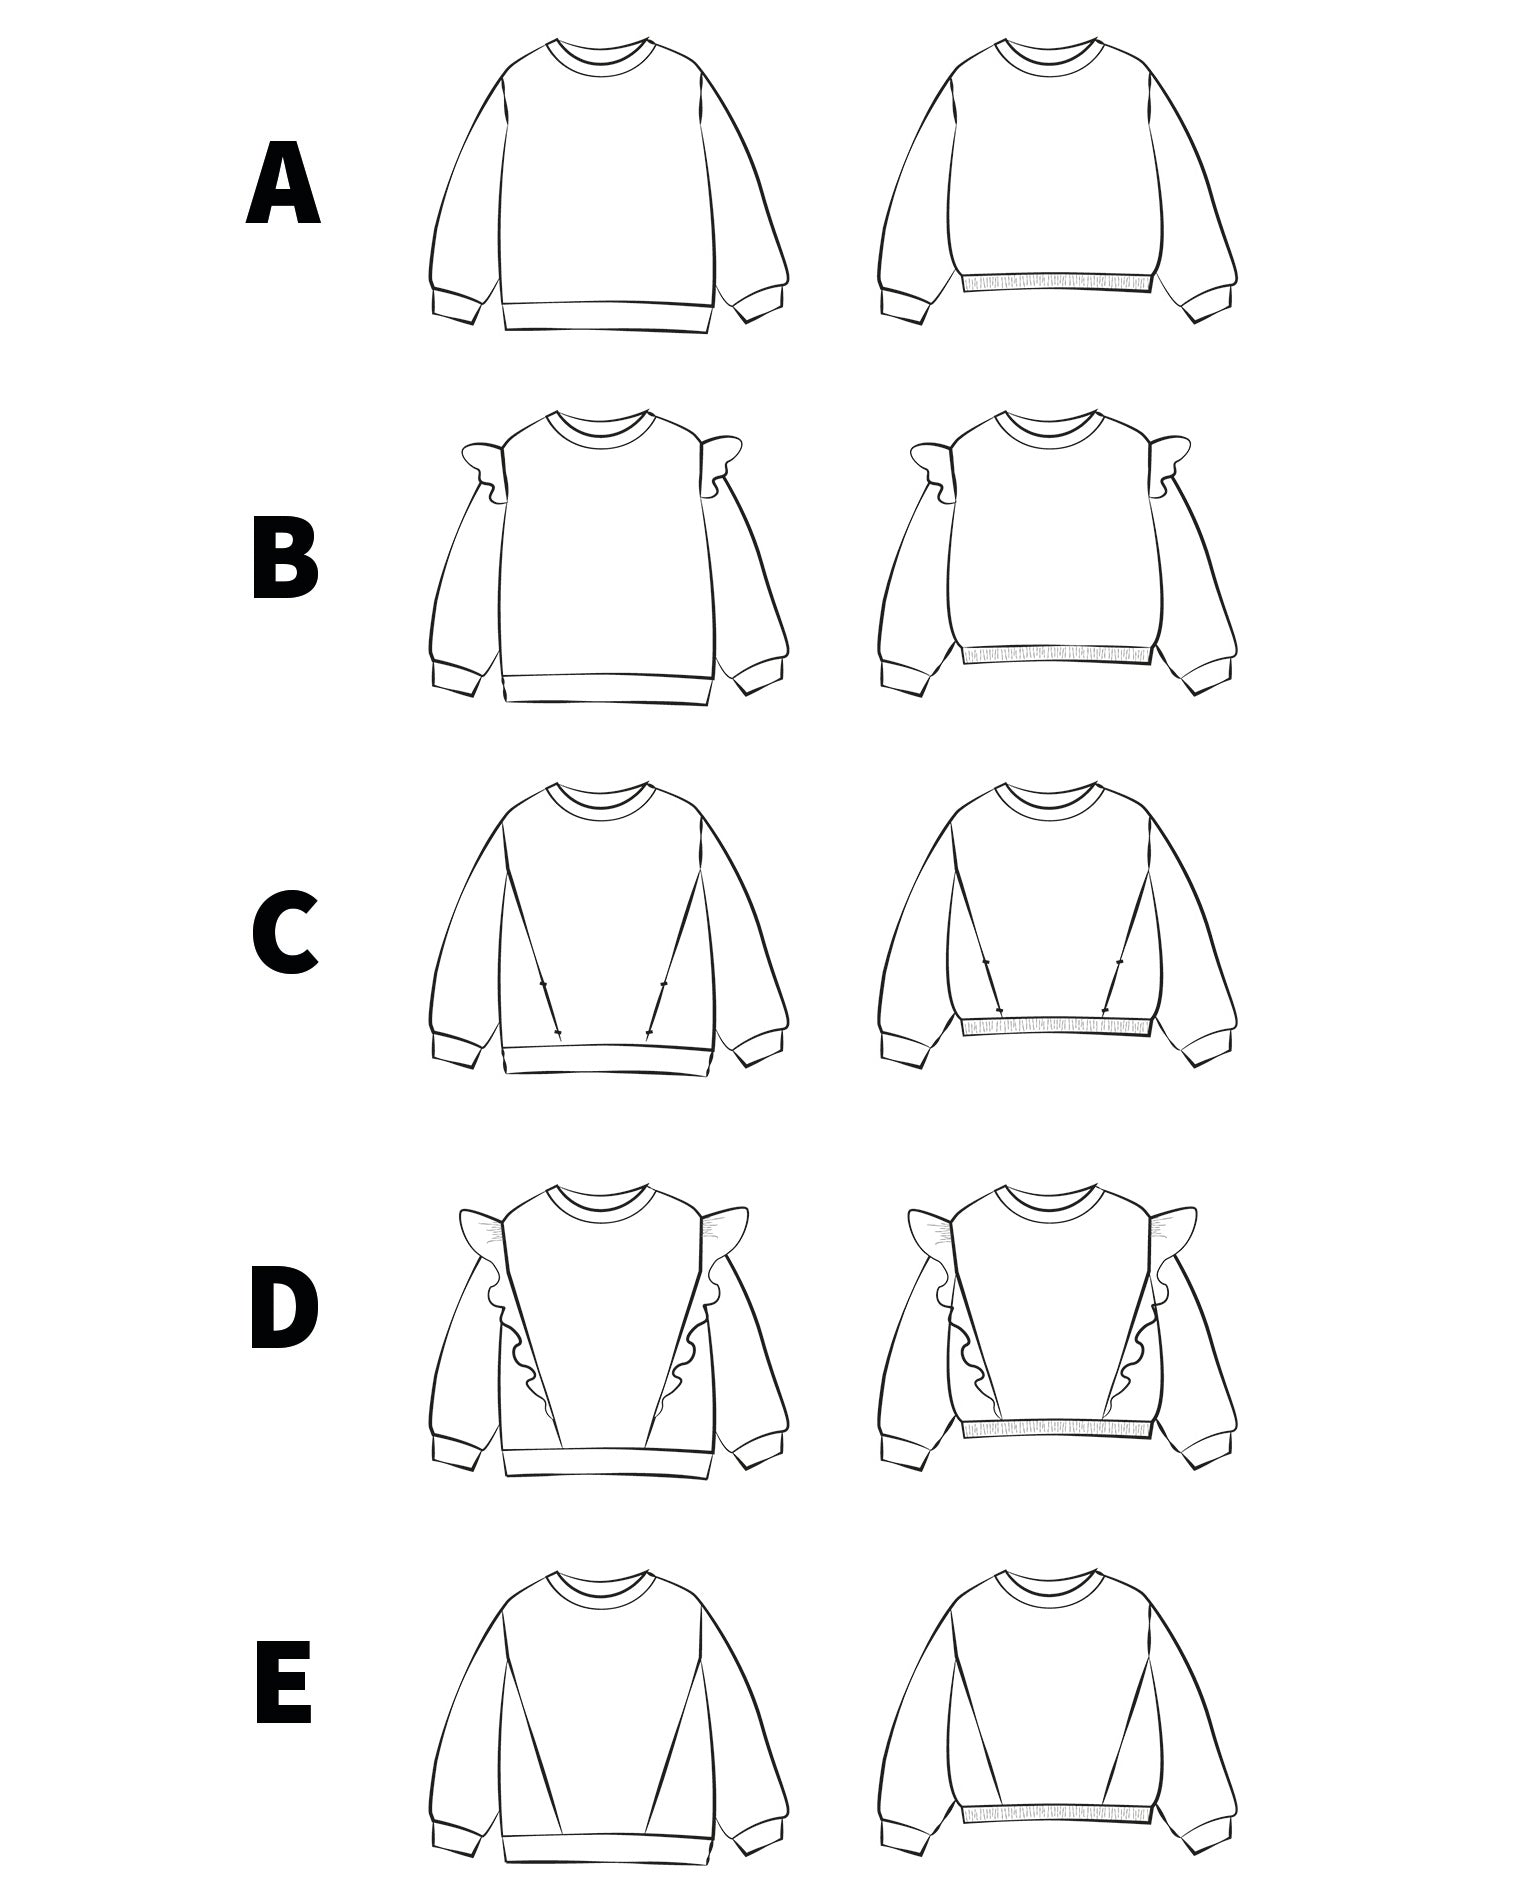
How about starting with the Frankie sweatshirt? It's a really fun pattern that suits both beginners and experienced sewists since it has both easy and challenging variants. And like all my sewing patterns, it's got step-by-step instructions like this one above.
>> Go to Frankie sweatshirt.
These are all the included variants in Frankie:

A quick re-cap with the most important steps: